

Deploy an MCP Server Using GitHub and Mcpfy
Mcpfy lets you deploy an MCP server from a GitHub repository and make it available as a hosted MCP endpoint. This guide walks you through the deployment process, from connecting your GitHub repository to configuring and deploying your MCP server.Note: The screenshots in this guide use an example MCP server. Your repository name, project directory, branch, build command, start command, environment variables, port, and other configuration values may be different. Use the values required by your own project.
Prerequisites
Before you begin, make sure you have:- A Mcpfy account
- A GitHub account
- An MCP server project
- Your MCP server code pushed to a GitHub repository
- A Git branch containing the code you want to deploy
- Any environment variables or secrets required by your server
Tip: It is recommended that you verify your MCP server builds and runs successfully in your local environment before deploying it.
1. Open the Mcpfy Dashboard
Sign in to your Mcpfy account and open the dashboard. From the dashboard, go to Servers and select New Server.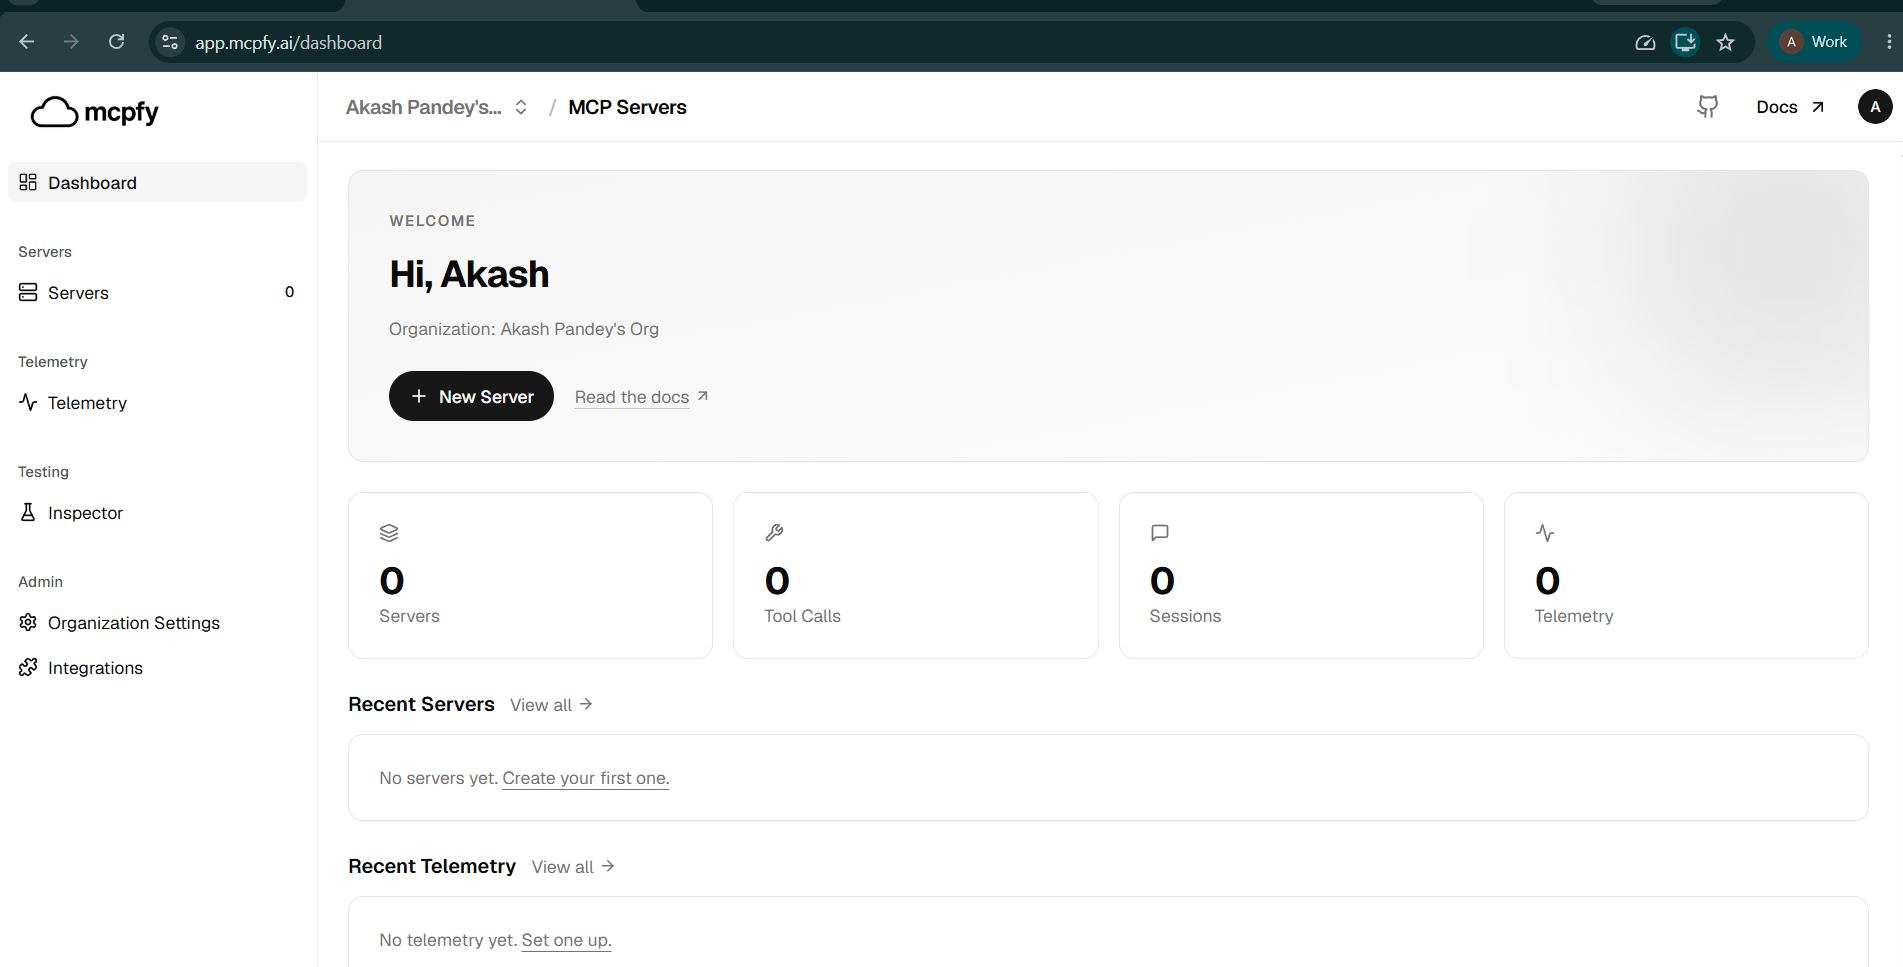
2. Import Your Server from GitHub
On the server creation page, select Import from GitHub.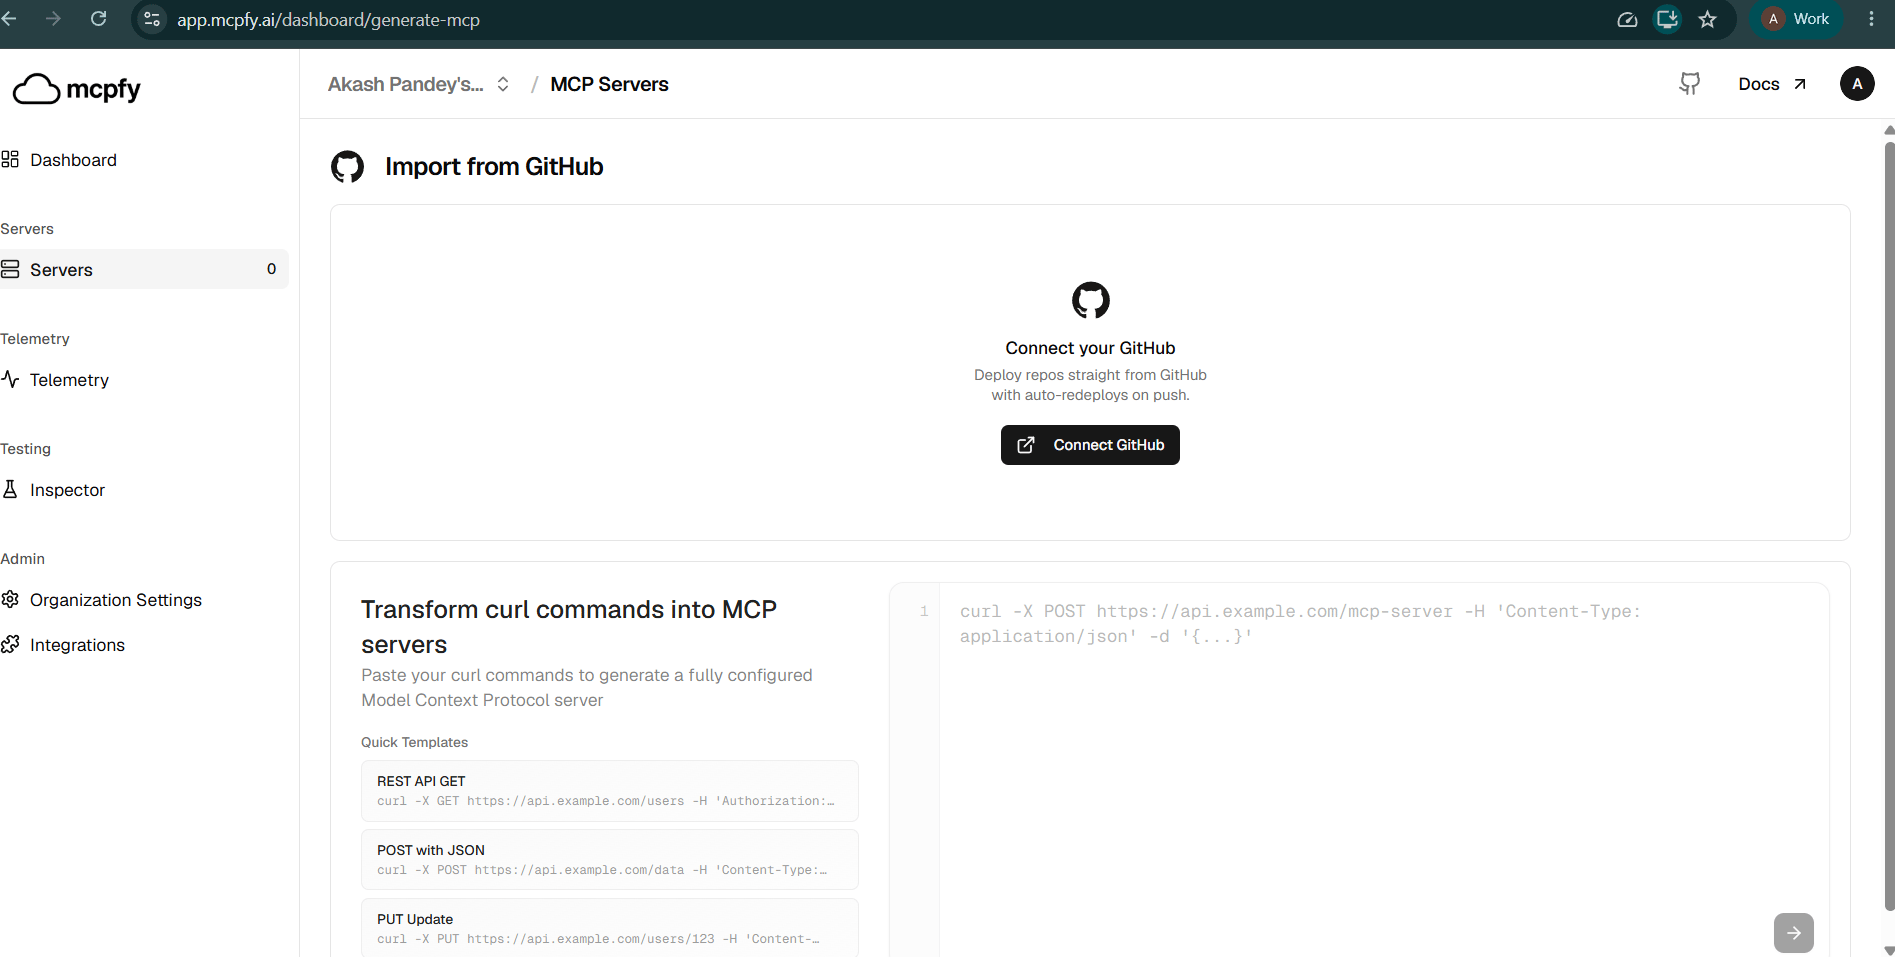
Important: Use your own GitHub repository. The repository shown in the screenshot is only an example.
3. Configure Your Deployment
After selecting your repository, Mcpfy opens the deployment configuration page. This is where you specify how Mcpfy should build and run your MCP server.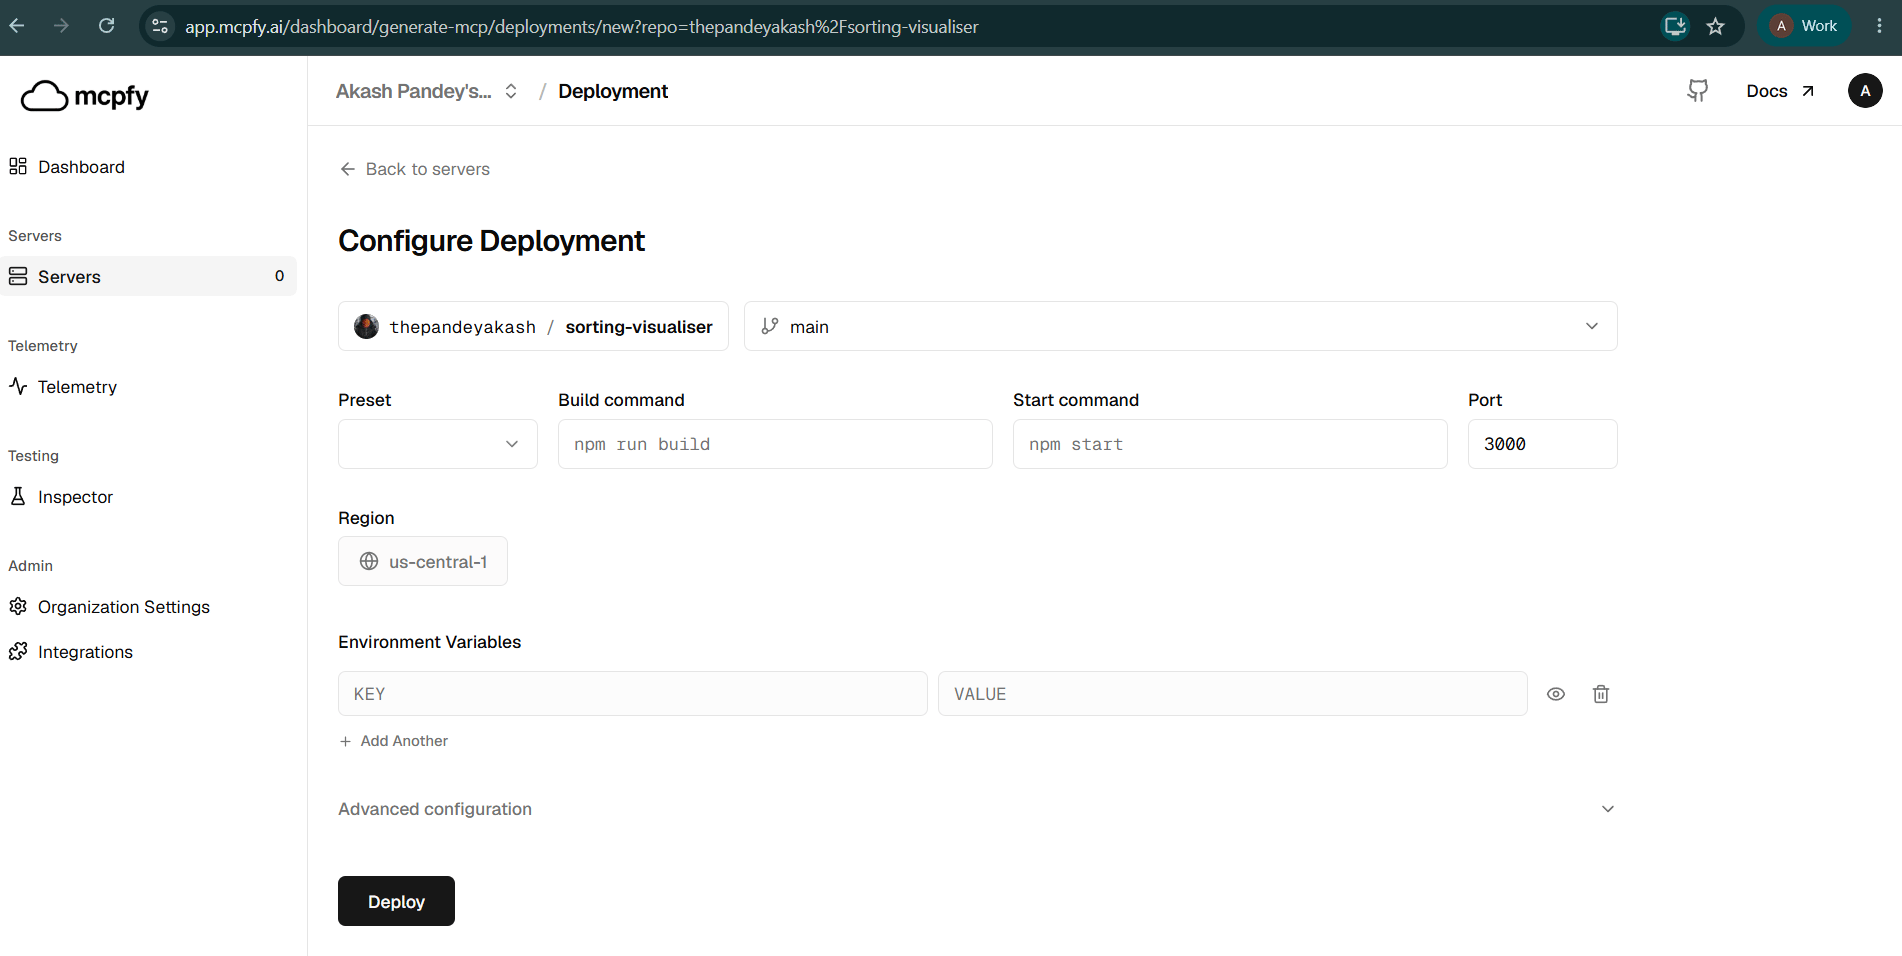
Repository
Select the GitHub repository containing your MCP server. For example:Note: The repository shown in the screenshot is only an example.
Branch
Select the Git branch containing the version of your server that you want to deploy. For example:Tip: Make sure the selected branch contains the code and configuration required to build and run your MCP server.
4. Select the Appropriate Preset
Select the preset that matches the technology used by your MCP server. Open the Preset field to see the available options.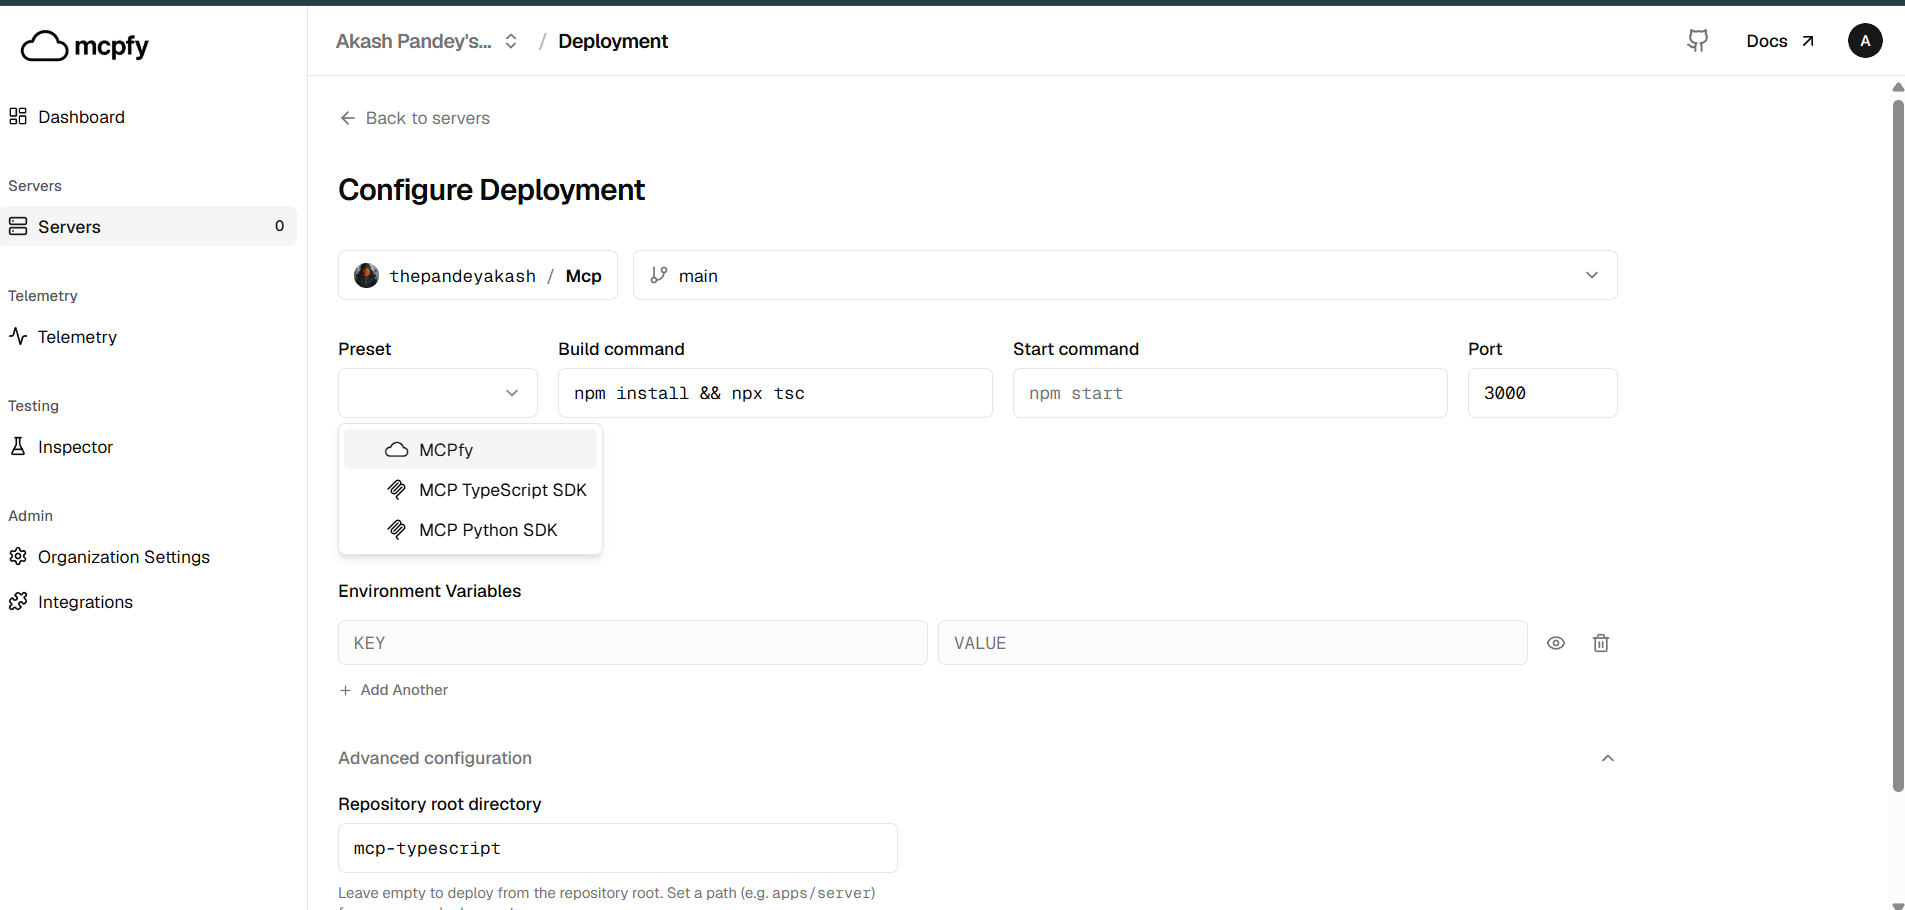
- MCP TypeScript SDK
- MCP Python SDK
Important: Do not copy the preset from the example deployment unless it matches your own MCP server.
5. Configure the Repository Root Directory
The Repository Root Directory tells Mcpfy which directory should be treated as the root of your application. This is useful when your MCP server is inside a subdirectory of a larger repository. For example:mcp-server, enter:
Tip: If Mcpfy cannot find files such as package.json or your source code during deployment, check that the repository root directory points to the correct location.
6. Configure the Build Command
The Build Command tells Mcpfy how to prepare your application before it starts. The correct command depends on your project’s runtime and build configuration. For example, a TypeScript project might use:package.json:
Tip: Check your package.json, project documentation, or local development workflow to determine the correct build command. If the command works locally, it is a good starting point for your deployment configuration.
7. Configure the Start Command
The Start Command tells Mcpfy how to start your MCP server after the build completes. For example:package.json contains:
Important: Make sure the start command actually starts your MCP server. Test it locally before deploying.
8. Configure the Port
Enter the port on which your MCP server listens. For example:9. Select a Region
Select the deployment region available for your application. Choose the region appropriate for your deployment requirements.Note: The region shown in the example screenshot is not a required value. Your deployment may use a different region.
10. Configure Environment Variables
If your MCP server requires environment variables, add them through the Environment Variables section. For example:
These are examples only. Your MCP server may require different variables.
To find the variables required by your project, check:
.env.example- Your project README
- Your application configuration
- The source code where environment variables are accessed
Security: Do not commit API keys, passwords, tokens, or other sensitive values to GitHub. Configure secrets through the deployment environment instead.If your server does not require environment variables, you can leave this section empty.
11. Review Your Configuration
Before deploying, review the configuration you entered. Check that:- The correct repository is selected.
- The correct branch is selected.
- The preset matches your MCP server.
- The repository root directory is correct, if applicable.
- The build command matches your project.
- The start command matches your project.
- The port matches your server configuration.
- Required environment variables are configured.
- The selected region is appropriate.
12. Deploy Your MCP Server
Once you have reviewed your configuration, select Deploy. Mcpfy will build your project and start the deployment using the configuration you provided. You can monitor the deployment from the deployment page.13. Monitor the Deployment
After deployment starts, Mcpfy displays information about the deployment, including its status, branch, commit, deployment URL, and logs.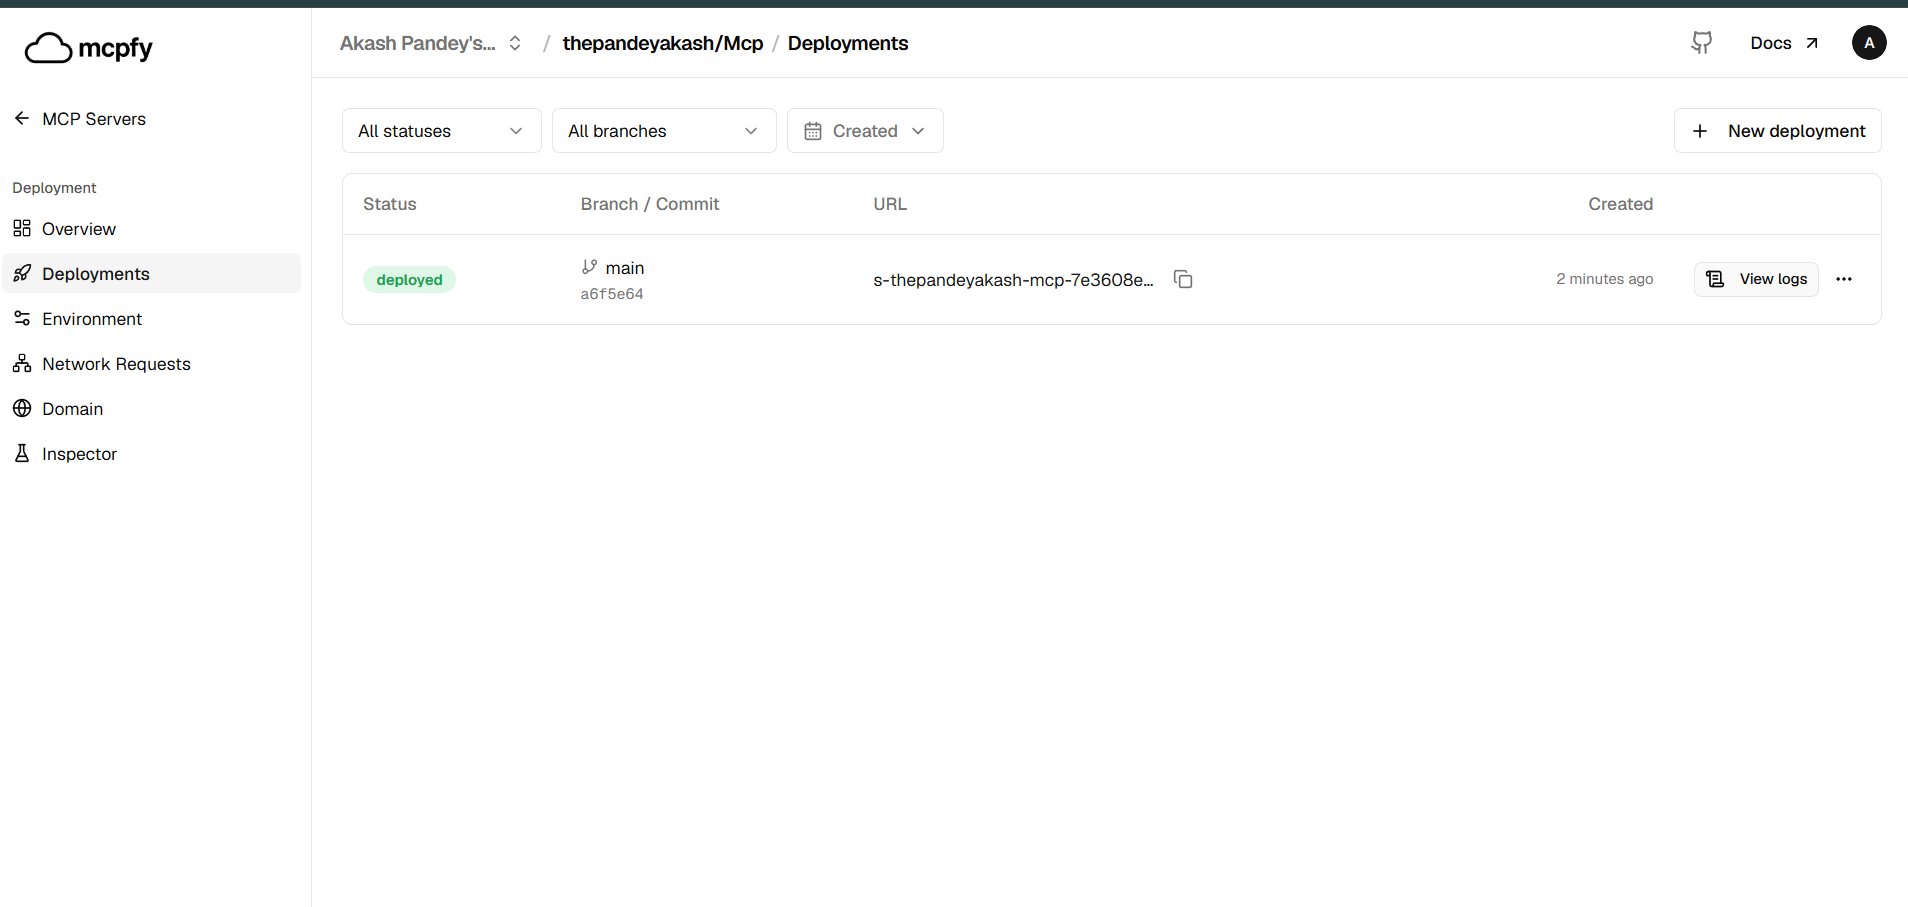
14. Get Your MCP Endpoint
After a successful deployment, Mcpfy provides an endpoint for your deployed MCP server. The endpoint generally follows this format:Important: TheUse Mcpfy Inspector or another MCP-compatible client to connect to and test your deployed server./mcpendpoint is an MCP protocol endpoint, not a conventional webpage. Opening it directly in a browser may returnMethod Not Allowed. This does not necessarily mean that the deployment has failed.
15. Test Your Deployed MCP Server
After deployment, connect to the MCP endpoint using Mcpfy Inspector or another MCP-compatible client. Verify that:- The client can connect to your MCP endpoint.
- Your server’s tools can be discovered.
- Your tools can be executed successfully.
- Your resources can be discovered, if your server exposes resources.
- The returned results are correct.
add tool, you should be able to discover and execute that tool through the Inspector. Your own server may expose completely different tools and resources.
Automatic Deployments
Once your GitHub repository is connected to a deployment, changes pushed to the configured branch can trigger a new deployment. The general workflow is:Verify Your Deployment
After deployment, use the following checks to confirm that your server is working correctly:
A successful deployment status confirms that the deployment completed. Connecting through an MCP-compatible client provides the most useful functional verification.
Troubleshooting
Deployment fails during the build
Check:- The build command is correct for your project.
- The selected branch contains the required source files.
- The repository root directory is correct.
- Your project configuration is valid.
- Required dependencies are available.
- The selected preset/runtime matches your project.
- The deployment logs for the specific error.
Tip: As a first step, try running the same build command locally.
Mcpfy cannot find project files
If Mcpfy reports that files such aspackage.json or your source files cannot be found, check the Repository Root Directory.
If your MCP server is inside a subdirectory:
Deployment starts but the server does not run
Check:- The start command is correct.
- The server starts successfully when run locally.
- The server is listening on the configured port.
- Required environment variables are configured.
- The deployment logs do not contain runtime errors.
Environment variable errors
If your server reports a missing API key, token, URL, or other configuration value:- Identify the environment variable required by your application.
- Open the deployment’s environment configuration.
- Add the variable using the exact name expected by your application.
- Provide the required value.
- Redeploy if required.
Browser shows “Method Not Allowed”
The MCP endpoint is designed for MCP protocol communication rather than normal browser navigation. Use Mcpfy Inspector or another MCP-compatible client to test the endpoint.Tools are not available
If your server is deployed but the expected tools are not available:- Confirm that the correct repository was deployed.
- Confirm that the correct branch was selected.
- Check the repository root directory.
- Check the deployment logs.
- Confirm that the server started successfully.
- Confirm that you are connecting to the correct MCP endpoint.
- Check the tools registered by your server.